HOW TO VINYL WRAP YOUR CAR AND MAINTAIN IT – A STEP-BY-STEP DIY GUIDE

HOW TO VINYL WRAP YOUR CAR AND MAINTAIN IT  – A STEP-BY-STEP DIY GUIDE

Considering that more than half of all cars come in monochromatic shades, your desire for a fresh appearance, a different color or finish, or something more artistic is entirely understandable. While a custom paint job was the traditional solution for years, the vehicle customization landscape underwent a revolution in the mid-1990s with the advent of vehicle vinyl wraps.

WHAT IS VINYL CAR WRAP?

While vinyl has been utilized since the 1950s for custom lettering, logos, and decals, the concept of fully wrapping a car in vinyl gained traction in 1993. This seemingly ordinary yet groundbreaking idea emerged when Germany mandated taxis to be colored beige, with no specific requirement for paint. Enter Kay Premium Marking Films, which rescued the day by introducing beige vinyl, enabling quick compliance with vehicle regulations for virtually any car within a few hours.

Vinyl car wrap is a composite of polyvinyl chloride (PVC) polymer, the origin of the term "vinyl," combined with various additives to ensure flexibility, resistance to ultraviolet light, and the addition of color. These components are blended, cast onto moving sheets, and subsequently baked and cured.

VINYL TRANSFORMATIONS

The resulting vinyl wraps can achieve an impressive thinness of just 2 mil, equivalent to two thousandths of an inch. Following the application of adhesive, these vinyl car wraps can be conveniently segmented into smaller rolls, catering to individual consumers, or dispatched to printers for the creation of custom graphics—ranging from the elegantly simple to the intricately complex.

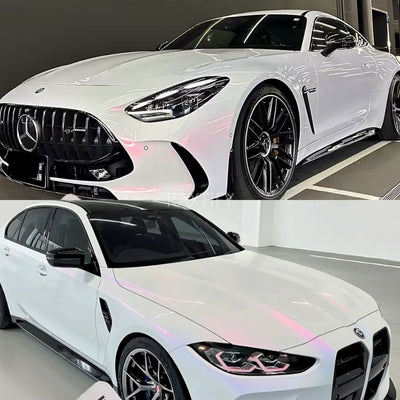
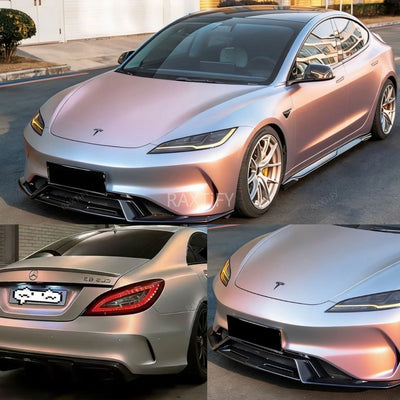
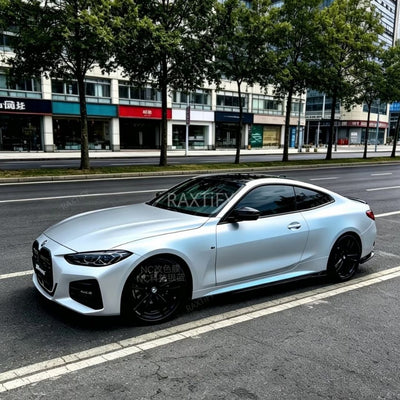
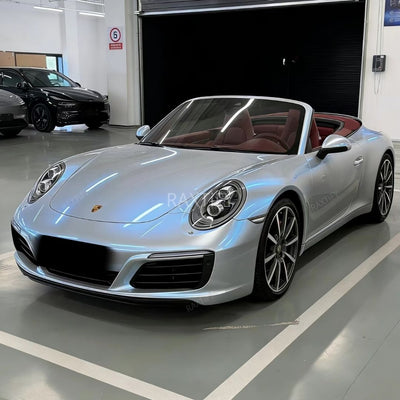
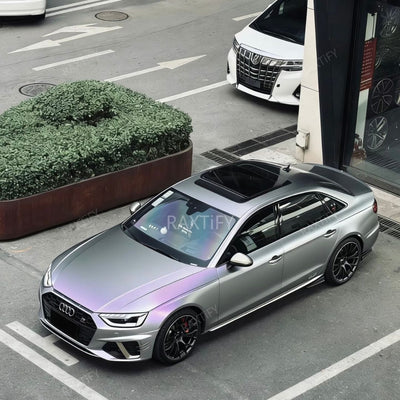
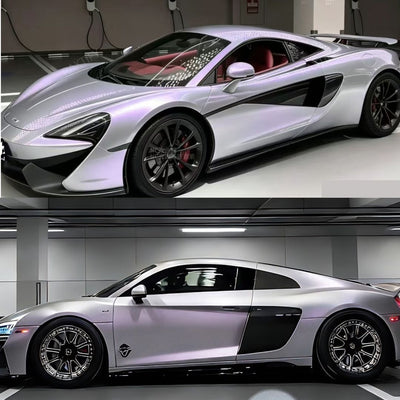
In essence, a vinyl car wrap constitutes adhesive-backed plastic sheeting. However, the possibilities with a roll of plastic have evolved significantly in recent years. We have transcended beyond basic solid colors, witnessing a remarkable transformation in the car wrap industry. Innovators have introduced metallic, reflective, matte, gloss, pearlescent, and color-changing options. The spectrum extends further to include factory-matching hues and Pantone colors, not to mention the availability of beautiful, stunning, and intricate patterns and combinations.

HOW TO VINYL WRAP YOUR CAR AND MAINTAIN IT – A STEP-BY-STEP DIY GUIDE

GUIDE TO VINYL WRAPPING: ADVANTAGES AND DISADVANTAGES

If you're contemplating a transformation for your vehicle, whether through a paint job or vinyl wrap, each option comes with its own set of merits. Traditionally, a paint job has been the go-to choice, having stood the test of time for over a century. Achieving a flawless finish with paint necessitates the expertise of a professional and specialized equipment, elevating both the cost and time involved. Introducing multiple or unique colors, like pearlescent or metallic finishes, further extends the timeline and expenses. Graphics or personalized designs often require the meticulous touch of a specialist, typically done by hand.

Basic or customized paint jobs can endure for the entirety of a vehicle's life, potentially spanning decades. While permanence might be appealing, bold color combinations can be divisive. For a show car boasting a rich history, a custom paint job can significantly enhance its overall value. However, it also runs the risk of diminishing desirability—after all, not everyone desires a daily driver adorned with pink skulls.

VINYL CAR WRAP TECHNOLOGY ADVANCEMENTS

With the continuous evolution of vinyl car wrap technology, transforming the appearance of your vehicle is now more affordable than ever, especially if you prefer a DIY approach. While opting for professional vinyl car wrapping can be as costly as a traditional paint job, undertaking the project yourself can be surprisingly budget-friendly with a bit of patience and precision. The necessary tools are readily available and require no specialized licenses, training, or prior experience. Basic color changes, including multiple hues, typically don't significantly impact the overall project cost. However, incorporating custom graphics, prints, or unique finishes may elevate material expenses. Nevertheless, the final result can be truly remarkable.

Vinyl car wrap, by its very nature, lends itself well to temporary applications. With proper maintenance, a high-quality car wrap can endure for five to seven years, or even up to ten years. While this may not be ideal for those seeking permanence, it's perfect for drivers who desire flexibility. Whether you plan to alter the vehicle's look in a couple of years or prepare to sell it, removing a vinyl car wrap is a straightforward process requiring only a few basic tools and supplies. Importantly, it leaves the original finish unaffected. In fact, the original paint job may outshine one of a similar age, as vinyl car wrap acts as a barrier against UV light, preserving the resale value of your vehicle.

HOW TO VINYL WRAP YOUR CAR AND MAINTAIN IT – A STEP-BY-STEP DIY GUIDE

THE STEP BY STEP GUIDE ON HOW TO VINYL WRAP YOUR CAR

Embarking on the journey of vinyl wrapping your car can be intimidating, especially if past attempts with vinyl lettering or graphics left you frustrated. Despite meticulous surface preparation and personal readiness, issues like tears, bubbles, stretch marks, and wrinkles might have made a full vinyl car wrap seem like a task best left to the professionals. The landscape has evolved, thanks to advancements such as more durable vinyl, improved adhesives, and air-release technology. Now, achieving impressive results is within reach for even the most dedicated DIY enthusiasts. Ready to delve into the world of DIY car vinyl wrapping?

GETTING READY TO VINYL WRAP YOUR CAR

1. Assess your canvas, the surface you're wrapping. Ensure the body and paint job are smooth. While minor scratches aren't a major concern, chips, dents, gouges, and rust can pose issues with the vinyl wrap. If the wrap adheres to a defect, it increases visibility, and if it doesn't, it may bubble or tear, compromising the wrap job. Address these imperfections before proceeding with the car wrap.

2. Choose an appropriate location. While you don't need a sterile medical research cleanroom, a clean and controlled environment prevents dust from interfering with the wrap. Similar to paint and body defects, dust, debris, and bugs can impact the finish. Sweep, vacuum, and mop if necessary, and ensure doors are closed for an optimal vinyl wrap project.

3. Opt for a warm day. Both vinyl and vinyl adhesive are sensitive to temperature. The vehicle and wrap should be at a consistent temperature, ideally around 68 °F (20 °C). Colder temperatures can make the vinyl brittle and prone to tearing, while hotter temperatures may activate the adhesive too aggressively, making smooth installation challenging. Utilize a non-contact infrared thermometer to monitor the temperature. Consider planning the job for a specific time of day or allowing everything to acclimate for a few hours before starting.

4. Gather your tools, supplies, and materials. A standard car typically requires a 25-foot roll of 60-inch wide vinyl wrap. While narrower rolls are available, creating a seam can be tricky for a first-timer. Additionally, you'll need grease and wax remover, a general cleaner, 70- or 90-percent isopropyl alcohol, lint-free cloths or towels, a squeegee, utility knife, cutting tape, heat gun, infrared thermometer, and cotton wrap gloves. A clean worktable helps keep everything off the floor, reducing the risk of picking up dust. If possible, enlist a buddy for this project, as it aids in handling larger sections of vinyl wrap and provides moral support.

HOW TO VINYL WRAP YOUR CAR AND MAINTAIN IT – A STEP-BY-STEP DIY GUIDE

SURFACE PREPARATION & PLANNING

5. Ensure your vehicle is spotless. Utilize non-wax car wash products to create a pristine surface for the vinyl wrap to adhere seamlessly. Subsequently, meticulously clean the entire surface using isopropyl alcohol and lint-free cloths.

6. Clear the wrap surface of any hindrances. Although it's possible to wrap around emblems, mirrors, door handles, antennas, or headlights, doing so significantly elevates the complexity and time required for a flawless vinyl wrap finish. Save yourself the hassle by eliminating obstacles. Conduct another alcohol wipe over the surrounding areas to eliminate any fingerprints or dust.

7. Precisely measure each section earmarked for wrapping, adding a few extra inches for maneuvering. Craft a diagram illustrating your car's body panels and jot down these measurements for future reference. Adopt the mantra of measuring twice, adding a bit extra, and cutting once. Keep in mind that once you've made a cut, you can't add material back! If a panel is nearly as wide as or wider than your broadest vehicle wrap, a seam will be necessary. Avoid attempting to wrap a 60-inch hood with a 60-inch wrap – you'll undoubtedly fall short.
HOW TO VINYL WRAP YOUR CAR AND MAINTAIN IT – A STEP-BY-STEP DIY GUIDE

LAYING YOUR FIRST VINYL WRAP: A STEP-BY-STEP GUIDE

8. Embarking on your initial vehicle wrap venture? Begin with smaller, flatter sections to bolster your confidence before delving into broader surfaces like roofs or contoured hoods. Refer to your sketch and measurements to gauge the required material, and wield a utility knife for precise cutting.
9. With cotton gloves donned, you and your partner suspend the vinyl in the air, peeling off the backing paper while maintaining consistent tension. This practice mitigates wrinkles and creases. Delicately position the vinyl wrap onto the designated panel, leaving surplus material around the edges for manipulation.
10. Press the vinyl gently into the panel's center, sustaining tension across the entire sheet. Employing a squeegee, commence from the middle, executing overlapping strokes towards the panel's periphery. This technique expels air and affixes the vinyl temporarily onto the panel.

SMOOTHING OUT AIR & WRINKLES

11. Dealing with curved surfaces presents a unique set of challenges, as you navigate the task of molding a two-dimensional material onto a three-dimensional form. If you happen to notice any wrinkles or bubbles during the process, delicately lift the vinyl and apply heat, maintaining a temperature no higher than 120 °F (80 °C). Apply tension to carefully stretch the material into place. Utilize the squeegee once more to smooth from the center outward. The same principles apply when wrapping items like mirrors, wheels, or interior panels. Achieving the perfect stretch on curved surfaces requires patience and precision.

12. Addressing seams can pose its own difficulties, but there are effective solutions. The simplest method involves overlapping one piece of vinyl onto another, demanding meticulous alignment without the need for cutting. The introduction of Kevlar cutting tape is a noteworthy innovation, ensuring seamless joints without the use of a blade. Alternatively, snap knives present a final option, featuring a sharp edge to prevent snagging and requiring a gentle touch to avoid any damage to the underlying paint. Remember, precision is key to flawless vinyl wrapping.

HOW TO VINYL WRAP YOUR CAR AND MAINTAIN IT – A STEP-BY-STEP DIY GUIDE

EDGING AND FINALIZING

13. Achieving a flawless finish commences with carefully wrapping the edges of the panels. Employ a utility knife to trim excess material, leaving approximately a quarter-inch (2-3 mm) margin from the edge – counterintuitively, wider margins prove less effective. Utilize a heat gun to uniformly heat the edges of the panel and vinyl wrap to a minimum of 212 °F (100 °C), activating the adhesive. Confirm even heating with a thermometer. Employ a squeegee and your fingers to securely seal the vinyl edge to the panel. When heating the vinyl around sharp curves, ensure the vinyl cools before trimming.

14. Once corners and edges are securely sealed, use the heat gun on the remaining portion of the panel or piece, maintaining a temperature of at least 212 °F. This activates the adhesive across the entire vinyl, ensuring a durable bond. Utilize your hands and a squeegee to firmly adhere the vinyl wrap to the surface. Though bubbles may surface at this stage, they can be safely punctured with a pin or utility blade and pressed down with your fingers. Reassure even heating with the thermometer. Allow a minimum of 12 hours for the adhesive to fully set, ensuring a lasting result. 

HOW TO CLEAN YOUR VINYL WRAP?

Ensuring the longevity of your vinyl wrap is crucial, and with the right care, it can maintain its pristine look for up to a decade. Here are essential steps to keep your vinyl wrap in optimal condition.

CLEANING & POLISHING

  1. Regular Washing: Prevent the accumulation of dirt and grime by washing your vinyl wrap frequently. Stubborn stains may require targeted application of isopropyl alcohol. Opt for quality car wash products like Turtle Wax MAX Power Wash or Turtle Wax Snow Foam, designed to protect glossy finishes and prevent matte vinyl from hazing.

  2. Gentle Cleaning: Hand washing and drying are recommended for vinyl maintenance. Use a silicone squeegee to eliminate excess water before drying with microfiber towels. Avoid brush car washes, as they can scratch and tug at the edges of your vinyl wrap. Opt for touchless or brushless car washes, and if using a pressure washer, ensure settings are gentle (under 2,000 psi, under 180 °F or 80 °C, >40° spray tip, at least 12 inches or 30 cm from the surface, and at right angles to the surface).

  3. Showroom Shine: Achieve a dazzling finish with Turtle Wax ICE Spray Wax or Clean and Shine. These products are safe on vinyl surfaces, preserving their color without fading or hazing. Note that polish and wax products may cause hazing and affect textured vinyl appearances.

HOW TO REMOVE VINYL WRAP?

Regardless of how meticulously you maintain it, the longevity of your vinyl car wrap is bound to vary. Some wraps endure for more than a decade, while others may only last a few years. Fortunately, the process of removing a vinyl car wrap is a straightforward task that requires only a heat gun and adhesive remover.

HOW TO REMOVE VINYL FROM YOUR CAR EFFICIENTLY

  1. Begin by using your fingernail or a plastic scraper to delicately lift the wrap from the edges of the entire panel. Though it might appear daunting initially, rest assured that it will be completely removed within a few minutes.

  2. Employ the heat gun to uniformly heat the wrap's surface to approximately 120 °F (50 °C). This gentle heat application will loosen the adhesive, facilitating easy removal. Confirm the temperature with a non-contact infrared thermometer to avoid overheating, which could result in excessive adhesive residue.

  3. Pull the wrap away from the edges at a steep angle, folding it back on itself at 15 to 20 degrees. If you encounter resistance, reheating the area will make the process smoother.

  4. For the final touch, use a reputable adhesive remover such as Turtle Wax Label & Sticker Remover or Bug & Tar Remover to eliminate any remaining adhesive residue from the panel's surface.

By following these steps, you can efficiently remove your vinyl car wrap, ensuring a clean and polished finish. This process is crucial, especially if you plan to apply a fresh vinyl wrap or if your current one is showing signs of wear and tear.

VINYL WRAP VEHICLE GUIDE

Q: Can I undertake the vinyl wrapping process independently?
A: Yes! Transforming your vehicle with a vinyl car wrap is a straightforward task that only requires a few essential tools, a clean workspace, and a patient approach.

Q: Can I use an automatic car wash for my wrapped vehicle?
A: While hand washing is the optimal choice for vinyl wraps, brushless or touchless car washes are equally safe. If done gently, a pressure washer can also be used.

Q: Will the car wrap affect my car’s original paint?
A: On the contrary, a car wrap can serve as a protective layer for your paint by blocking harmful ultraviolet light. Upon removal, the original finish remains intact.

Q: What is the typical lifespan of a vinyl wrap?
A: The durability of a car wrap varies based on factors such as the wrap's quality, type, proper installation, post-installation care, and environmental conditions. Generally, car wraps can last anywhere from three to ten years.

Q: Are there any surfaces that cannot be wrapped?
A: Vinyl car wraps adhere best to smooth factory paints and rigid plastic surfaces. They may not bond well, or at all, with subpar paint jobs, surfaces with orange peel, deep scratches, gouges, rust, chipped paint, flaking paint, textured surfaces, rubber, ABS plastics, porous, or spongy materials.

HOW TO VINYL WRAP YOUR CAR AND MAINTAIN IT  – A STEP-BY-STEP DIY GUIDE

Conclusion

In your hands, you now hold the keys to transforming your vehicle's aesthetic with vinyl wrapping. From the fascinating history of vinyl wraps to a detailed DIY guide, you've learned the art of giving your car a unique, personalized touch.

Vinyl car wrapping is not just a trend; it's a creative expression that anyone can master. With advancements in technology and materials, the once complex process has become more accessible. Remember, attention to detail during application and diligent maintenance will ensure your vinyl-wrapped car turns heads for years.

As you venture into this exciting realm, don't be afraid to experiment with colors and finishes. The journey of vinyl wrapping is as much about creativity as it is about technique.

Happy wrapping, and may your car always reflect your individuality on the road!

Related Recources

1. Shop trending vinyl wrap colors in 2024
2. Shop gloss metallic vinyl wraps
3. Shop color shift vinyl wraps

Leave a comment

Please note, comments need to be approved before they are published.

Other blog posts

  • RAXTiFY VINYL WRAP

Midnight Car Wraps Collection

  • RAXTiFY VINYL WRAP

Car Wraps That Change Color: What are They?

  • RAXTiFY VINYL WRAP

How Much Does It Cost To Wrap A Car In Pink

  • RAXTiFY VINYL WRAP

How Much Does It Cost To Wrap A Car In Laser?