

Vinyl wrapping has emerged as a prominent trend in the automotive world, captivating car enthusiasts globally with its ability to transform the appearance of vehicles using a spectrum of colors and finishes. For those who relish the hands-on approach, venturing into DIY projects adds an extra layer of excitement. To cater to such aficionados, we present a comprehensive guide on how to effectively apply a vinyl wrap to your car, coupled with essential after-care advice.
Required Tools For Vinyl Wrapping

Step-By-Step Guide To DIY Vinyl Wrapping
Once you have all the necessary tools, you are all set to start the process:
Step 1: Make A Good Plan
Step 2: Measure The Dimensions
When wrapping different sections of your car, it's crucial to measure each part separately. Remember to add an extra three inches to all sides to ensure you have enough material to work with. This surplus material will be invaluable for pulling and tucking the vinyl into the edges effectively. Begin by measuring the hood, then the fenders, followed by both the driver and passenger sides. For the rear fender area, allocate an additional 12 inches to accommodate the curvature.

When measuring the bumper, start from the back as it tends to be wider. Don't overlook adding an extra three inches for bleed. It's essential to meticulously record all measurements for accuracy. Now, onto cutting the vinyl panels. Be sure to acquire ample vinyl material, as mistakes are inevitable, even for professionals. Unlike a specialist, you won't have the luxury of reusing vinyl film, so having excess material is crucial. This surplus will also provide enough material to neatly tuck the edges. Emphasizing this point cannot be overstated: procure more vinyl than you anticipate needing to avoid any shortage during the wrapping process!
Step 3: Clean And Prepare The Vehicle
This stage is crucial for ensuring the successful completion of your project. It's imperative to thoroughly rid your vehicle of any grime, dust, or debris that could compromise the final result. Start by using a degreaser to eliminate any residue from the surface. Follow up with a cleaning solution, using a lint-free cloth to ensure a pristine finish. Often overlooked, the nooks and crannies of your car harbor the most dirt, so pay extra attention to these areas. To tackle these tricky spots, wrap a lint-free cloth around a squeegee and meticulously swipe until they're spotless. This requires patience and diligence, but the results are worth it.

After cleaning, ensure your vehicle is completely dry to allow proper adhesion of the vinyl. It's essential to maintain a clean workspace throughout. Before beginning, sweep your garage to prevent any stray particles from landing on your freshly cleaned car.
Wearing gloves, run your fingertips over the surface of your vehicle to detect any imperfections. Vinyl, like paint, accentuates every crack or dent, so it's crucial to address these issues before proceeding. Your car should be dent-free before starting the application process.
Step 4: Cut The Vinyl Sheets To Size
Trim the vinyl film according to your pre-measured dimensions. When rolling out the film for cutting, ensure the liner side faces downward. Take your measurements as noted earlier and mark them on the film using a dry erase marker. Proceed to cut the panel accordingly. Repeat this process for the remaining panels, storing them securely, perhaps in your vehicle to prevent any contamination. It's helpful to label each panel with a dry erase marker indicating its corresponding part to avoid confusion later on.

Step 5: Apply The Vinyl On Your Car

Smooth out wrinkles and air bubbles in the applied film using a squeegee at a 45-degree angle. Start from the center and move outward towards the edges to ensure a bubble-free surface. When working on curved surfaces, glide the squeegee downwards in an arc motion for a seamless application.
Ensure your squeegee has both a firm and soft side. Reserve the firm side for tight spots and crevices, as excessive pressure can damage the film. For hard-to-reach areas, employ a heat gun to soften the vinyl, facilitating easier manipulation. Adjust the vinyl as necessary to conform to curves and corners, lifting and heating it to enhance pliability. This technique simplifies shaping around challenging contours.
Step 7: Remove The Excess Vinyl Wrap
During this stage, it's crucial to be mindful of the tool you're using to remove the wrap, as it could inadvertently damage the underlying paint. Any nicks or cuts to the car's surface may necessitate replacing the film and addressing the damage before proceeding further. When cutting the vinyl, ensure it extends approximately 14 centimeters beyond the panel's edges. This surplus material provides ample room for neatly tucking it around corners and concealing any potential imperfections. It's advisable to keep the cutting blade at a safe distance from the vehicle at all times. Given the intricacies involved, newcomers to vinyl wrapping are encouraged to practice on small sections before tackling the entire body.

Step 8: Tucking The Vinyl Edges
Once all cuts have been made, it's crucial to neatly tuck away any edges. A well-executed wrap should be devoid of unsightly creases or peeling. Excessive strain on the edges could result in breakage, necessitating a complete panel replacement. To alleviate tension around sharp curves, employing a thermometer and heat gun is recommended. Gently heating the material to approximately 90°F helps to soften it, facilitating the elimination of wrinkles. However, it's essential to avoid overheating, as this can lead to material degradation.

Step 9: Secure The Vinyl With A Heat Gun
Once all the necessary preparations are completed, utilize a heat gun to ensure optimal adhesion of the vinyl wrap. Glide the heat gun in sections of about 6 to 8 inches (15-20 cm), paying particular attention to pressing the vinyl into any indentations or grooves for a secure fit. Following the post-heating process, allow a day for the wrap to fully set. This crucial step activates the adhesive properties of the vinyl, ensuring it adheres firmly in place. Aim to heat the vinyl within the range of 200° to 250°F (93° to 121°C), although it's important to note that the ideal temperature may vary depending on the specific type of vinyl used.

During heating, it's not uncommon to encounter a few bubbles. Don't panic; instead, use an air release pen to gently puncture and then press out the air with your finger, effectively removing the bubble without compromising the overall application.
Things To Look Out For
For optimal adhesion of your vehicle wrap, meticulous cleaning is essential. Prepare a solution using a blend of rubbing alcohol and water, with a ratio of 10%-15% alcohol to 85%-90% water.
Before application, inspect the wrap thoroughly. Ensure there are no discolorations or scratches present on the film. For matte finishes, confirm a consistent lack of gloss across the entire surface. Investing in high-quality film minimizes the risk of imperfections.
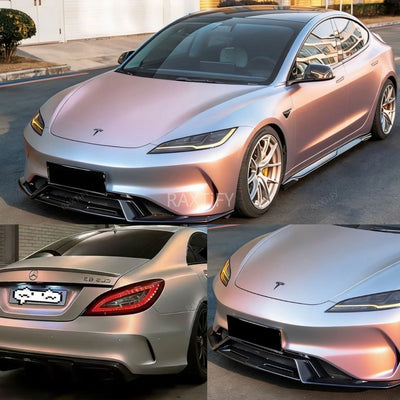
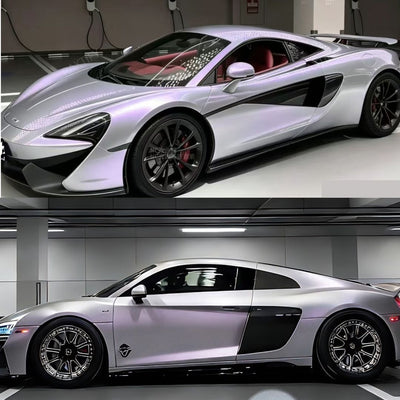
When using metallic vinyl, ensure that the flakes align uniformly to maintain consistent color appearance throughout the wrap. Avoid excessive stretching, as it can cause damage to the material.
Precise heat application is crucial. Test the film's heat tolerance beforehand to prevent any potential damage during application.
Wrapping After-Care
It's crucial to maintain the cleanliness of your car wrap. Once you've transformed your vehicle into a stunning gem, ensure its upkeep by hand washing. Automated car washes are a no-go; instead, opt for a gentle manual wash.
Employ a mild detergent alongside a soft microfiber cloth for washing. Post-wash, delicately dry the vehicle with another soft cloth. Avoid the use of high-pressure jet washers; two buckets of water, one soapy and the other clean, should suffice. Remember to clean the tires separately.
Steer clear of oil-based products and wax for your vehicle. Additionally, always park your car in the shade, shielding it from direct sunlight.
Keep a spray bottle containing an alcohol-water mixture and a microfiber cloth in your vehicle for spot cleaning fuel spills, bird droppings, or any other contaminants. This simple kit ensures you're prepared for unexpected messes on the go.
Frequently Asked Questions
Q1: How do I prepare my car for wrapping?
A: Clean the surface thoroughly, remove any wax or debris, and ensure it's completely dry before application.
Q2: Can I wrap my car in any weather conditions?
A: It's best to wrap your car in a controlled environment with moderate temperatures, ideally between 60-75°F (15-24°C), to ensure proper adhesion.
Q3: Do I need special tools to wrap my car?
A: Yes, you'll need basic tools like a squeegee, heat gun, knife, and cutting mat for precise application.
Q4: How long does it take to wrap a car?
A: The time varies depending on the size of the vehicle and your experience level, but it typically takes a few days for a complete wrap.
Final Thoughts
Optimize your vehicle's appearance effortlessly with a choice between a classic glossy or contemporary metallic single-colored vinyl wrap. Not only does this option offer refinement and modern flair, but it also provides a layer of protection for your automobile's paint that can endure for years. Moreover, opting for a vinyl wrap is notably more budget-friendly than committing to a full paint job, making it a savvy commercial investment.
With its high-quality vinyl and application procedures that are gentle on your car's paint, you can rest assured that your vehicle will maintain its integrity while boasting a fresh new look. The versatility of vinyl wraps allows for easy customization, ensuring that your automobile stands out in the crowd.
Related Resources:
The Pros and Cons of Car Wrapping Vs. Painting
How Much Does It Cost To Vinyl Wrap A Car?