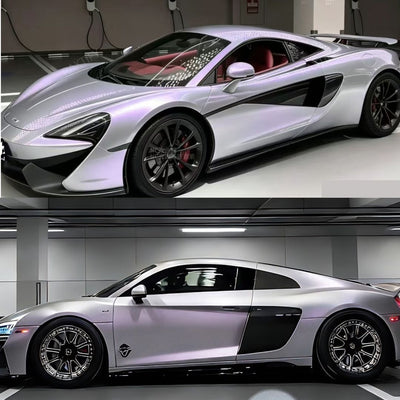


A dazzling automobile, adorned in a splendid silver vinyl, gracefully captivates onlookers with its sleek, high-speed design. Resembling a radiant gem on wheels, this vehicle serves as a testament to the owner's distinctive taste, boldly breaking away from conventional choices by embracing the eye-catching chrome vinyl wrap.
What Are Chrome Wraps?
Discover the epitome of automotive elegance with our premium Chrome Wraps—exquisite films that transform your vehicle into a captivating spectacle! These wraps, available in Mirror Chrome, Opal Chrome, and Satin Chrome variants, redefine vehicular aesthetics with their distinct surface finishes.
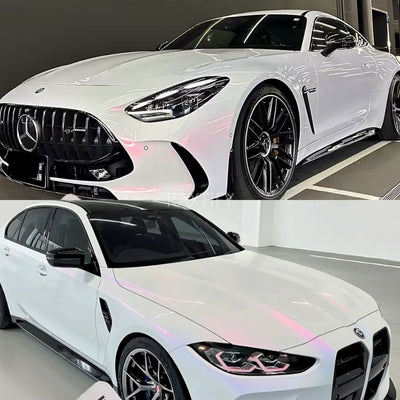
The Mirror Chrome wrap, true to its name, exudes a specular brilliance that catches the eye. Its flashy facade, available in gold and silver shades, shimmers brilliantly in the light, making your vehicle the center of attention.

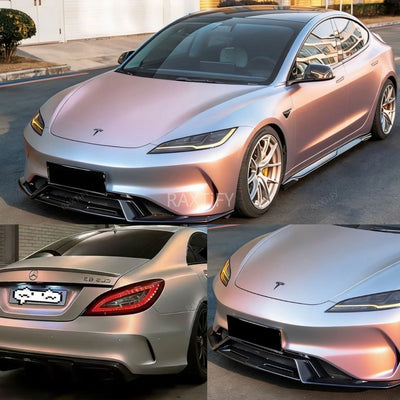
For a more enchanting display, consider the Opal Chrome vinyl. With a reflective nature and an iridescent shimmer, it boasts a captivating play of vibrant hues on your car's surface. Choose between black and white shades to achieve the desired effect.
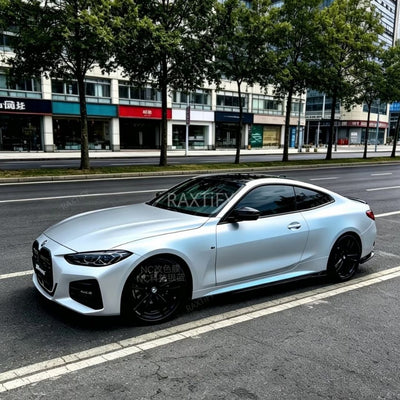
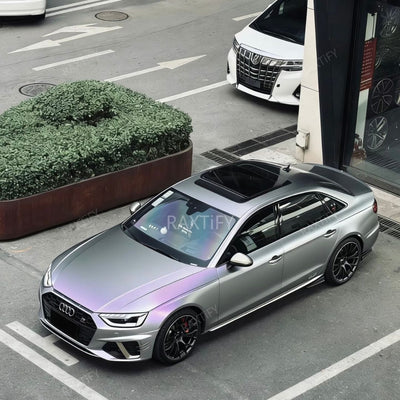
On the other hand, Satin Chrome

offers a refined allure, akin to silk draping over your vehicle. Its smooth, pearlescent finish exudes sophistication without the ostentatious gleam. Select from a range of bright colors to infuse class into your ride.
Crafted from high-grade polymeric vinyl, our Chrome Wraps ensure durability and longevity. The thin films, equipped with a pressure-sensitive acrylic adhesive and air release channel, guarantee a seamless, bubble-free installation. Reposition them effortlessly during application, leaving no room for errors. Once installed, these wraps act as a protective shield against environmental elements, ensuring your vehicle retains its allure.
Tools Required For Installation
Essential Tools for a Seamless Vehicle Vinyl Application:

Precision Measuring Tape: Accurately measure different areas of your vehicle and the vinyl to minimize material wastage.
Sharp Cutting Blade: Cut the vinyl precisely based on measurements, ensuring a tailored fit for each section.
Effective Surface Cleaner: Craft your own solution using isopropyl alcohol and water (2:1 ratio) in a spray bottle to thoroughly clean your vehicle's exterior.
Gentle Microfiber Cloth: Safely wipe down your vehicle, as this lint-free, scratch-resistant cloth ensures a pristine surface.
Versatile Heat Gun: Guarantee a strong bond between the vinyl and your car's surface by using a heat gun for optimal adhesion.
Wet Buffer Solution: Create a soapy water mix in a spray bottle to facilitate the smooth glide of the squeegee over the vinyl, preventing unwanted marks.
Infrared Thermometer: Monitor temperature levels to prevent vinyl overheating during application.
Handy Magnets: Keep the vinyl securely in place with small magnets while working on different sections.
Efficient Squeegee: Achieve a flawless vinyl application by using a squeegee to remove creases and ensure a smooth finish.
Protective Gloves: Safeguard your hands and the delicate chrome film from potential damage during the application process.
Important Points To Know Before Installing Chrome Vinyl

Installing chrome vinyl requires a delicate touch, setting it apart from other films due to its vulnerability to damage. For those lacking experience in vehicle vinyl wrapping, entrusting the task to professionals is advisable. Here's crucial insight into working with this unique film:
1. Chrome vinyl demands meticulous handling, as improper care may lead to cracking or hazing. Its susceptibility to tearing during installation adds an extra layer of complexity.
2. Precision is key during installation, requiring the right pressure without overstretching or overheating, as these actions can compromise the mirror finish.
3. To mitigate marks and scratches, opt for a soft, clean squeegee when applying the film. When removing creases, be cautious about the squeegee angle to prevent surface scratches.
4. Unlike some films, chrome vinyl lacks self-healing properties, making it less forgiving when defects arise. Once scratched, these marks cannot be remedied with heat.
5. Careful heat application is vital. Avoid using a propane torch; instead, opt for a heat gun, ensuring the temperature is kept low to prevent the film from burning.
Chrome vinyl, being non-directional, offers flexibility in application, maintaining a uniform appearance regardless of orientation.
Process Of Installing Chrome Vinyl
Below is the detailed process of installing chrome vinyl on your cherished set of wheels:
Step 1: Prepare Your Vehicle For The Wrap
Before embarking on the car wrapping process, ensure your vehicle is impeccably clean, free from dust, and devoid of any contaminants. Address any dents or scratches preemptively, as neglecting these imperfections could compromise the overall aesthetic appeal of the final result.
Initiate the process by giving your car a thorough wash, paying meticulous attention to often overlooked areas such as the wheel wells and beneath the wipers. Employ a microfiber cloth to meticulously dry the vehicle, ensuring a pristine surface for the upcoming wrapping endeavor. Take the extra step to cleanse intricate areas like panels, seams, and behind rubber seals with isopropyl alcohol, guaranteeing a spotless foundation for the wrap application.
This meticulous pre-wrapping preparation not only enhances the visual outcome but also contributes to the longevity of the wrap. Attend to these details diligently to elevate the final appearance and durability of your vehicle's new look.
Step 2: Cut The Chrome Vinyl
Prepare for chrome vinyl application by accurately measuring and cutting each section of the car. Allow for a 4-6 inch margin beyond the actual dimensions to facilitate stretching and repositioning of the wrap. It's crucial to ensure that the surface temperature of the car stays below 80°F during the process to prevent any damage to the film.
Once you've tailored the chrome vinyl to fit the specific car panel, proceed with the wrapping process. Be mindful of the surface temperature, as exceeding 80°F can compromise the integrity of the film.
Optimal results are achieved by adhering to these precise measurements and temperature guidelines. This not only ensures a seamless application but also safeguards the durability of the chrome vinyl. Now, let's delve into the step-by-step process of transforming your car's appearance with this expertly applied chrome vinyl wrap.

Step 3: Apply The Vinyl
To facilitate this task, enlist an extra set of hands to assist you. Utilize magnets to securely hold the film in position. Once the chrome film is properly situated, remove the protective liner promptly. Failure to do so may hinder your ability to reposition and stretch the film effectively. This liner serves the crucial purpose of shielding the film from potential damage during transportation.
Keep in mind that professional service costs may vary based on location. When seeking professionals, prioritize experienced installers and scrutinize their past projects to ensure compatibility with your requirements. Take the time to read customer reviews as they provide valuable insights. Obtain quotes from different local installers, allowing you to make an informed decision after comparing prices and services.
If you opt to undertake the boat wrapping process independently, you can potentially save 50% or more compared to hiring professional services. While there will be expenses for tools, the overall cost remains considerably more economical. Ensure you invest in the necessary tools, as they play a pivotal role in achieving a successful outcome. Additionally, exploring tutorials and guides can enhance your proficiency in the wrapping process, making the DIY approach a feasible and cost-effective choice.
Step 4: Remove Creases With A Squeegee

Smooth out those wrinkles with finesse using a gentle touch and a soft squeegee—a crucial step that demands precision. Before employing the squeegee, generously apply a lubricant to the area. Opt for a mix of soapy water in a convenient spray bottle; this ensures the squeegee effortlessly glides over the wrap, preventing tears or unsightly marks. Hold the squeegee at a comfortable 45° angle and employ delicate strokes. Direct your efforts towards the panel's edges to effectively expel any trapped air and smooth out the vinyl, keeping those pesky wrinkles at bay. This meticulous process not only enhances the appearance but also prolongs the lifespan of your wrap.
Step 5: Trim Off The Extra Chrome Vinyl
Trimming off excess wrap demands precision. Keep an additional 10-20mm sheet around the edges for optimal results. Maintain your gloved hands when working with chrome vinyl on edges, and utilize a heat gun to activate the adhesive by gently heating the edges. Ensure a wrinkle-free finish by pulling the vinyl taut and stretching it beneath the edge, sealing the deal with firm pressure.
When maneuvering chrome film around corners, enlist the help of a companion for this task. The key lies in a harmonious blend of heat and uniform pulling. Divide the work into manageable sections, stretching only as much as necessary. Once all edges and corners are securely in place, perform a delicate post-heating sweep using the heat gun for the finishing touch.
This meticulous approach not only safeguards against unwanted wrinkles but also guarantees a seamless application. Working with a partner not only makes the process smoother but adds an extra layer of precision. Remember, attention to detail is the secret to a flawless chrome vinyl wrap.
Pros And Cons Of Chrome Vinyl

The merits of chrome vinyl are truly captivating and spellbinding. When professionally applied, Beyond its aesthetic appeal, chrome vinyl serves as a protective shield for the underlying paint, offering a layer of defense against the elements.
However, it's essential to note that elegance sometimes comes with a price tag. Scratches on chrome vinyl can be quite conspicuous, necessitating careful handling during application and afterwards. Maintenance, too, poses a challenge, requiring diligent care to preserve the lustrous chrome wrap.
In the pursuit of automotive allure, it's crucial to weigh the allure of chrome vinyl against its potential drawbacks. While it undoubtedly enhances visual appeal and safeguards your vehicle's exterior, the need for meticulous care and the visibility of scratches underscore the importance of informed decision-making in the realm of vehicle aesthetics.
Frequently Asked Questions
-
Q: How much does it cost to wrap a car in chrome?
- A: The cost of chrome car wrapping varies based on factors like the size of the vehicle, type of chrome film used, and labor. On average, it can range from $2,000 to $6,000 or more.
-
Q: How long does it take to wrap a car in chrome?
- A: The time required for chrome car wrapping depends on the complexity of the vehicle and the experience of the installer. Generally, it takes around 2 to 5 days to complete the process.
-
Q: Is chrome car wrap easy to maintain?
- A: Chrome wraps require special care to maintain their appearance. Regular hand washing with mild soap, avoiding harsh chemicals, and keeping the car sheltered from extreme weather conditions can help preserve the finish.
-
Q: Can chrome car wraps be removed?
- A: Yes, chrome wraps are removable. Professional installers can safely remove the wrap without damaging the underlying paint. However, removal should also be done by experts to avoid any potential issues.
-
Q: Does chrome car wrapping damage the original paint?
- A: When installed and removed by professionals, chrome car wraps should not damage the original paint. In fact, they can act as a protective layer, preserving the factory finish of the vehicle. Proper installation and removal techniques are crucial to prevent any issues.
Wrap It In Chrome!
Transform your vehicle into a captivating marvel on the road with our Chrome car wraps, offering a sleek and opulent appearance bound to capture attention. This premium-quality wrap not only enhances aesthetics but also provides a robust shield for your car's paint. While its price may surpass that of alternative vinyl films, it remains significantly more economical than opting for a full-fledged chrome paint job.
Elevate your driving experience by embracing the futuristic allure of chrome vinyl. Our wraps boast a perfect blend of style and practicality, ensuring your vehicle stands out while enjoying the added benefit of paint protection. The cost-effectiveness of our solution makes it an appealing choice for those seeking a sophisticated look without breaking the bank.